What you get
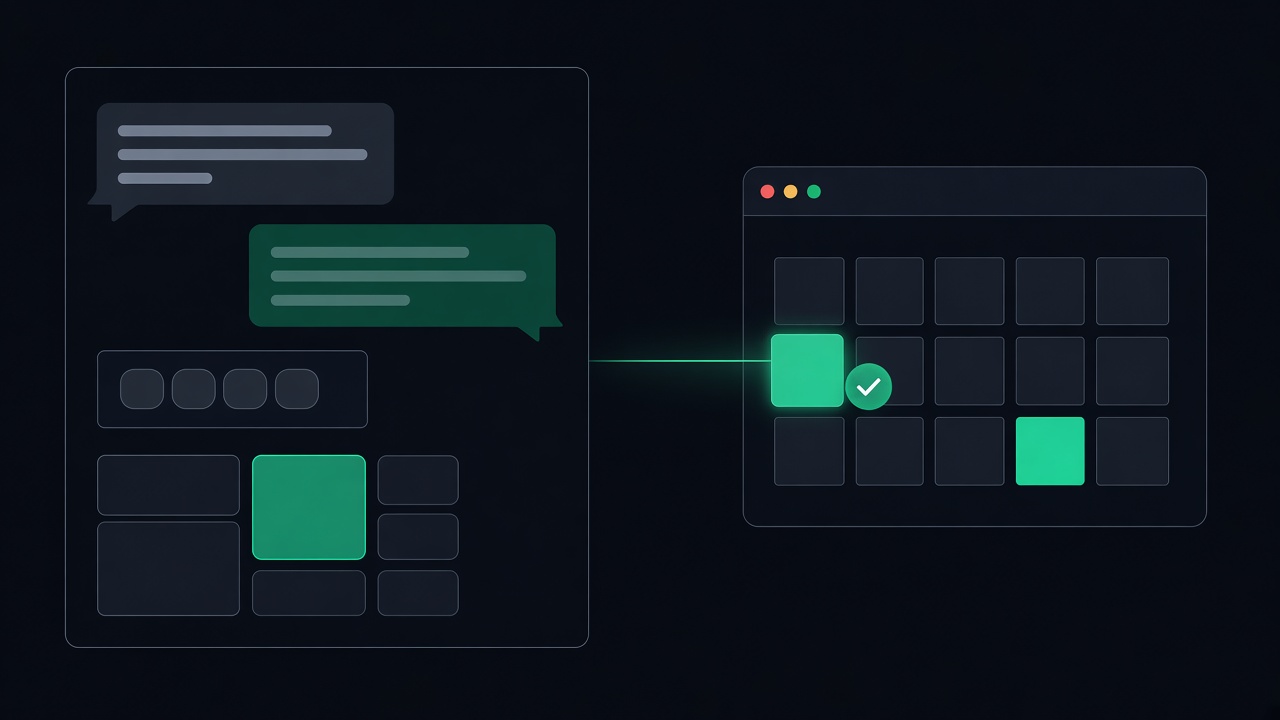
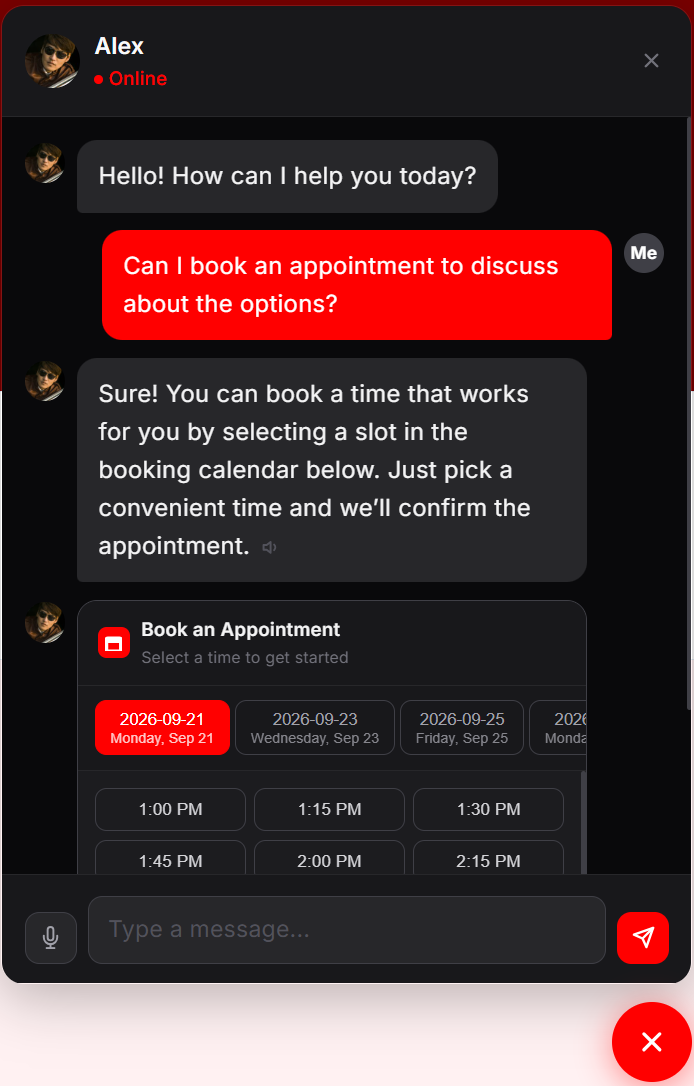
- A booking calendar inside the chat widget, showing your open times for the next 14 days
- No separate booking page and no login for your customers
- A confirmation email to the customer and to you, for every booking
- A link in the customer's email to reschedule or cancel on their own
- Optional Google Calendar sync, so your existing appointments block those times
Booking is built in. There is no extra app to connect and no separate plan to buy.
Before you start
You need a ChatNexus agent. If you are starting fresh, the Appointments & Scheduling template gives you an instruction and a starter knowledge base written for booking. Service businesses can also start from Salon & Spa, Healthcare Intake, or Coaching & Consulting.
Step 1 — Set your timezone
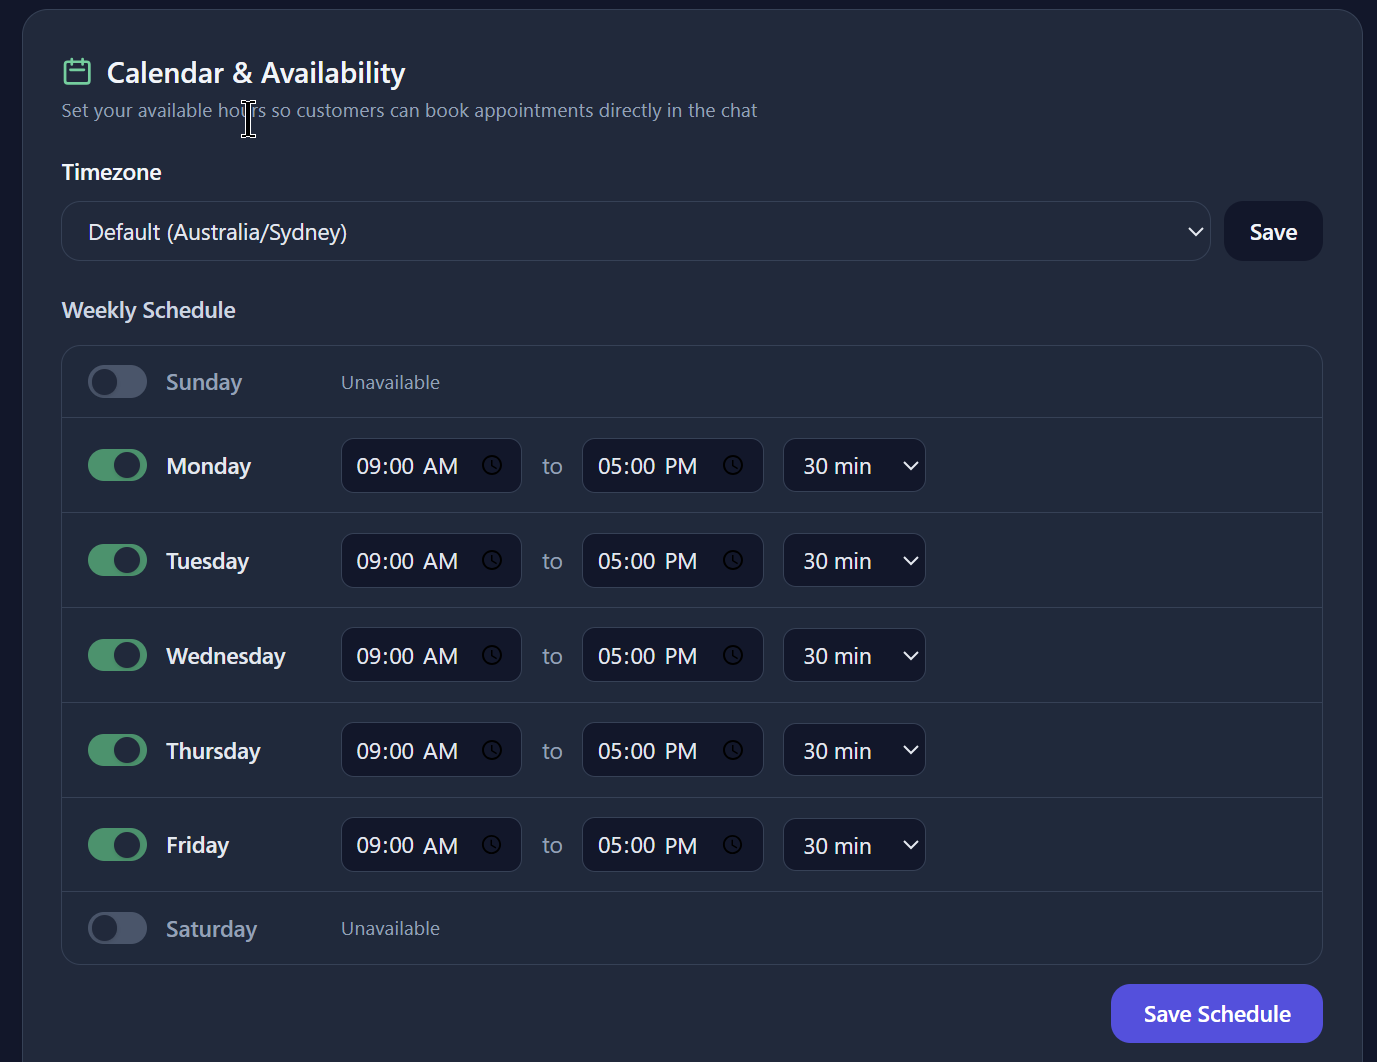
Open the agent and scroll to Calendar & Availability. Pick your timezone and click Save. Every slot your visitors see, and every time in the emails, uses this timezone. Do this first, so "9 AM" in your schedule means 9 AM where you are.
Step 2 — Set your weekly hours
Under Weekly Schedule, for each day:
- Turn the day on or off with the toggle.
- Set the start and end time, for example 9:00 AM to 5:00 PM.
- Choose the appointment length: 15, 30, 45, 60, 90, or 120 minutes.
Click Save Schedule. Saving the schedule is what switches booking on for this agent. From then on, when a visitor asks about times or appointments, the agent can show the calendar.
Step 3 — Block holidays and add extra hours
Under Blocked Dates / Exceptions, choose a date and a type:
- Block / Unavailable closes that day. Add a start and end time to block only part of it, such as a long lunch.
- Extra Availability opens hours on a day you are normally closed, such as one Saturday a month.
The reason field is optional and only for you. Add the public holidays for the next few months now, so nobody books a day you are closed.
Step 4 — Connect Google Calendar (optional)
If you already keep appointments in Google Calendar, click Connect Google Calendar in the same section. Once it is connected:
- Times marked busy in your Google Calendar are hidden from visitors
- Each confirmed booking is added to your Google Calendar as an event
- When a booking is cancelled or moved, the event is removed or replaced
You can skip this step. Bookings made through the chat still block their own slot, so two visitors cannot take the same time.
Step 5 — Teach the agent about your services
The calendar handles the "when." The knowledge base handles the questions people ask before they book. Add a short section for each of these:
- What each service is, how long it takes, and what it costs
- What to bring or prepare for the first visit
- Your cancellation policy and how much notice you need
- Your address, parking, or the video link for online sessions
Short sections with clear headings work best. See how to build an effective knowledge base for examples.
Step 6 — Test it in the Test Chat
Open the agent's Test Chat and type something a customer would say: "Can I book an appointment for next week?" The agent replies and shows the booking calendar. Pick a date, pick a time, and fill in the form. Name and email are required. Phone and notes are optional.
Step 7 — Put it on your site
Booking works anywhere the chat widget runs. Copy the embed code from the agent, or on WordPress use the free plugin. The WordPress guide covers it in three steps. Before you share the widget, add your site under Allowed Domains so nobody else can run your bot. Here is why that matters.
What happens after someone books
- The customer gets a confirmation email with the date, time, and timezone. It includes an "Add to Google Calendar" button and a link to manage the booking.
- You get a confirmation email too, and the booking shows under Upcoming Bookings on the agent with the customer's name, email, and phone.
- If plans change, the customer opens the manage link and picks a new time or cancels. No account and no password. Both of you get an email about the change, and the old slot opens up again.
A few limits to know
- Visitors can book up to 14 days ahead.
- One appointment length per day, as noted above.
- Payments and deposits are not collected in the chat. Put your payment terms in the knowledge base.
- Each agent has its own calendar. If two staff members keep separate diaries, give each one an agent.
For more detail on each setting, see the Appointment Booking guide, or read how the agent decides when to show the calendar in automating appointment booking with an AI assistant.
Take your first booking this week
Start from the Appointments & Scheduling template, set your hours, and test a booking. Free for 30 days. No credit card.
Get Started Free →